
Before discussing how to change your online status, you should know what each status means:
Offline The Skype user is offline. Being Offline means that the user has disconnected from the Skype network.
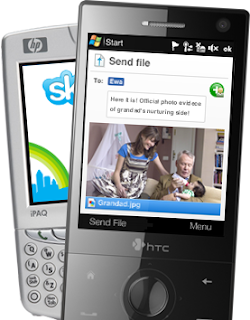
Online The Skype user is online. Online means that the Skype user is ready to make and receive calls, chat, and voicemail. It also means that the user can send and receive files.
Skype-Me The Skype user is in Skype-Me mode. Skype-Me mode means, in effect, that you are making yourself available to the wider Skype community, because while in this mode your privacy settings are ignored. Anyone can call you while you are in Skype-Me mode.
Away The Skype user is away from Skype. Online status changes to away when the PC on which Skype is running has been inactive for a period of time that you can specify the default is five minutes.
Not Available The Skype user is not available. This online status is similar to Away, but indicates that the user has stepped away from the PC running Skype for a prolonged period. You can specify the period of inactivity before Skype switches to Not Available the default is 20 minutes.
Do Not Disturb The Skype user does not want to be disturbed. While in this mode, you won’t be pestered by popup notifications of incoming calls or chat.
Invisible The Skype user has chosen not to make his or her online status visible to others. However, when online the privacy settings for that Skype user remain in effect.
Skype>File>Change My Online Status, and then choose the online status you want. Or you can use the pull-down menu at the bottom left of Skype’s softphone main window.
Friday, December 31, 2010
Understanding Skype Offline Status

To change the details of your online profile at any time, go to Skype>
File> Edit My Profile …. This displays the My Profile form in a window, as shown in the figure.
The details of your online profile are divided into three categories:
- Details that all Skype users will see
- Details that only your contacts will see
- Private details
First, you can add a picture to your profile. When you call or chat with another Skype user, this picture appears in his Skype softphone. Skype comes with a set of default pictures that you can use, or you can purchase more using the Personalise Skype service. To change the picture for your profile, simply click on the Change … button and a window titled My Pictures will pop up with a list of available pictures. Click on a picture and then click the OK button to change the picture in your online profile. Second, including a valid e-mail address in your profile has both advantages and disadvantages. A valid e-mail address is necessary in order to reset your password should you forget your current password, and it also means that you will get 30-day and 7-day warnings when your SkypeOut credits are in danger of expiring. On the other hand, adding an e-mail address to your online profile also enables others to search for you using this e-mail address; that is, a Skype search using your e-mail address will return your Skype user name. This means that friends who know your e-mail address, but not your Skype user name, can find you. But it also means that people who you don’t want to talk with can find your Skype user name if they know your e-mail address.
Paying Tax for SKype Service
 If you use only the free features of Skype, you need not pay any taxes.
Period.
However, if you are a subscriber to one or more of Skype’s fee-based services, you might be obligated to pay taxes. Subscribers whose billing address is in a country that is a member of the European Union will be charged Value Added Tax (VAT) when they purchase services. But subscribers elsewhere, including the United States, will not be charged any taxes. This, however, does not necessarily mean you don’t owe taxes on payments for those services!
In the United States a form of tax called the Sales & Use tax is levied at the state level, and sometimes the local level, on goods and services you purchase outside of your home state. If such a tax is not collected by the seller, then you—the buyer—are required by law to pay it. This is a complex issue beyond the scope of this book, and so you should check with your local tax authority or seek professional tax advice regarding the rules for making Skype purchases.
If you subscribe to Skype’s fee-based services and live somewhere other than the European Union or the United States, you will need to determine the tax status of Skype purchases for yourself by checking with the tax authorities for your jurisdiction.
Tuesday, November 30, 2010
How to Get a Refund from Skype?
 You can cancel SkypeOut, SkypeIn, or Skype Voicemail at any time and get a refund. Here’s what you do for each service:
 SkypeOut: If you have spent less than 1 ($1.20) of your last subscription payment, Skype will refund the whole amount of that payment. If you spent more than 1 , Skype will refund only the remaining balance.
SkypeIn and Skype Voicemail: If you ask for a refund within
30 days of your last subscription payment, Skype will refund the whole amount of that payment. After more than 30 days, Skype will refund only the amount remaining for your subscription on a pro-rata basis.
Refunds take five to seven business days to appear on your online financial statements.
You can’t get a refund for Skype Zones, but there’s no long-term contract or exit fee either!
Canceling Skype Service
To cancel SkypeOut, SkypeIn, or Skype Voicemail service, you need simply submit a support request. Go to support.skype.com and click on the link Submit Support Request.
To cancel Skype Zones service, e-mail zonessupport@skype.net or call Boingo at 1-866-526-4646 (1-310-460-3906 outside the United States) at least five days before your next billing date.
To cancel Skype Zones service, e-mail zonessupport@skype.net or call Boingo at 1-866-526-4646 (1-310-460-3906 outside the United States) at least five days before your next billing date.
Seven Skype Alternatives
Skype isn’t the only game in town! Other Internet telephony providers are even cheaper than Skype for some types of calls. You can mix and match alternatives to Skype to get the overall best deal. Don’t be afraid to shop around for the best deal. Using the tips that follow, and by searching using an Internet search engine such as Google (using search terms such as “VoIP” and “softphone”), you will quickly find plenty—and in some cases cheaper—alternatives to Skype. However, a few words of caution. When considering alternatives to Skype, be sure to consider issues such as voice quality (Skype’s voice quality is very good), privacy, security, ease of use, support for advanced features such as video and chat, and software and hardware compatibility with your PC.
To get you started, here are some alternatives to Skype:
www.voipstunt.com is a softphone that you install on your PC which allows you to make free calls to other VoIPStunt users. In addition, it allows you to make free calls to regular landline phones in several countries, including the United States, Canada, United Kingdom, Australia, and New Zealand. Even more amazing is the fact that you can also call mobile phones for free in some of these countries, including the United States and China. More amazing still is that you can get a free regular dial-in number, although the list of countries for which you can get them is more restricted.
www.voipbuster.com offers free calls to regular landline phone numbers in the following countries: Andorra, Australia, Austria, Belgium, Bulgaria, Canada, Chile, Colombia, Croatia, Cyprus, Denmark, Estonia, Finland, France, Georgia, Greece, Hong Kong, Iceland, Ireland, Italy, Japan, Latvia, Liechtenstein, Luxembourg, Malaysia, Monaco, Mongolia, Netherlands, New Zealand, Norway, Panama, Peru, Portugal, Puerto Rico, Singapore, Slovenia, South Korea, Spain, Sweden, Switzerland, Taiwan, Thailand, and Venezuela. Like VoIPStunt, VoIPBuster offers free regular dial-in numbers for some countries. Check the VoIPBuster website for details and restrictions.
www.gizmoproject.com is a softphone with features and services that are very similar to Skype.
www.freeworlddialup.com is a service that is based on open standards and so can work with different softphones. It offers free softphone-to-softphone calls, and free calls to some regular phones.
www.google.com/talk is a softphone from the folks at Google. It enables you to speak for free with other Google Talk users, and supports instant message chat. Unlike Skype, you can use Google Talk to chat with other chat message client programs.
messenger.yahoo.com is an instant messaging chat client that also supports free PC-to-PC voice calls. It also offers low perminute rates for calls to regular phones.
messenger.msn.com is a softphone that supports voice calls, video, and chat messaging.
Sunday, October 31, 2010
Money Saving Advices on Skype

In addition to reducing the per-minute cost of your calls and reducing or eliminating fixed charges and taxes, there are other money-saving strategies you can employ by using Skype. I’ll skip the fatuous advice, such as “make fewer calls,” or “use e-mail instead,” because this chapter is about saving money by using Skype, or alternatives to Skype. Though I must say, “make fewer calls” has worked wonders in my family, and was accompanied by a family-wide sigh of relief!
Remember that you can call anyone who uses Skype for free. That means that if you convince people you call frequently, such as family members, friends, and even business contacts, to join Skype, you could save a lot of money. For example, suppose you spent $50 last year speaking to Uncle Tom on a land line. This year, however, you both decide to join Skype. That means you’ll save $50 this coming year, and each and every year beyond that. Indeed, you needn’t watch the clock any longer, and so can speak with Uncle Tom more often and for longer. In short, the more people you convert to Skype, the more money you will save.
Using Skype, you can even reduce the regular phone bills of others. You can do this by subscribing to one or more SkypeIn numbers.
How you do this is best illustrated using an example. Suppose you live in Baltimore, but have a lot of friends and family in London, England. By choosing a London number for SkypeIn, those same friends and family can call you in Baltimore for the cost of a local call—instead of an international call. Indeed, you can have several dial-in numbers (up to 10) dotted around the globe. Friends and family anywhere can then call what is a local number for them at their local rate (sometimes for free), and these calls will then be routed for free (courtesy of the Skype P2P network) to wherever you happen to be signed in to Skype. This way, friends and family can save money by calling your SkypeIn numbers at their local rates, while you can receive such calls anywhere on the planet!
Of course, this strategy will save money for others but not for you, as you will have to pay to subscribe to SkypeIn numbers. But think of all the goodwill it will buy you!
Saving on Taxes and Fixed Charge

The only really meaningful way to attack your fixed charges and taxes is to eliminate one or more phone lines. For example, suppose you have two telephone lines, and your monthly fixed charges and taxes are $50. If you eliminate one telephone line and replace the other with Skype, you will save about $25 a month on fixed costs alone.
The bottom line is this: you can’t start attacking fixed charges and taxes unless you can shed phone lines. If you are able to eliminate one or more lines, sum all the monthly fixed charges and taxes on your phone bill, and then divide that sum by the number of phone lines you have. This will give you the fixed charges and taxes per phone line per month. For each phone line you can eliminate, you will save about that much money, every month.
Determining Saving on Cost of Skype Calls

Look at your most recent phone bill, or bills, as maybe you have both a regular phone and mobile phone. Or better yet, if you still have them, gather several months’ worth of bills. From your itemized list of calls, pick out the 10 most expensive calls.
Now go to the Skype Dialing Wizard at www.skype.com/products/ skypeout/rates/dialing.html, and for each call you have chosen, enter the telephone number and note down the per-minute call rate that the Skype Dialing Wizard gives you. An example of how to get the per minute call rate for a specific number, using the Skype Dialing Wizard, is as shown in the following figure.
Next, round the call duration of each of your chosen calls so that they’re expressed in whole minutes. For example, round a 45-second call up to 1 minute, and round a 5-minute, 25-second call up to 6 minutes. Now multiply these whole-minute call durations by the corresponding SkypeOut call rates you obtained from the Skype Dialing Wizard. Compare these totals with the actual cost of each of the calls on your phone bill. If your calculated numbers are less than your actual numbers from your phone bill, you would have saved money using Skype. And, provided your calling habits don’t change much, you will most likely save money if you use Skype in the future. It’s as simple as that. Keep in mind that there’s no concept of local, long distance, interstate, or international calling in Skype. All call rates are global rates, in the sense that a SkypeOut call rate for a particular destination is good when dialing from anywhere on the planet. If you make a lot of local, toll-free calls—calls that are not itemized on your regular phone bill—then making these calls using Skype will cost you money. Toll-free local calls become toll calls when dialed from Skype. This should be factored into your cost-saving calculations. To estimate your cost of local calls if you were to fully switch to Skype, estimate your monthly minutes of local calling and multiply that number by the SkypeOut rate for your locality (country code plus area code). There’s nothing stopping you from keeping a regular phone for local calls and switching only your long distance and international calls to Skype.
Thursday, September 30, 2010
Economic Considerations on Skype
 Your regular and mobile phone bill is normally made up of two parts: cost of calls, and fixed charges and taxes. You can use Skype to reduce the overall cost of your phone calls, and reduce—in some cases even eliminate—your fixed charges and taxes.
The cost of an individual call is the duration of the call, measured in minutes (and sometimes fractions thereof), multiplied by the call rate. For example, a 7 minute call at a call rate of 5 cents per minute will cost you 35 cents. The lower the call rate for a given destination, the lower your cost of calls to that destination. You can use Skype’s very low per minute call rates to save money on your overall cost of calls.
Over the years, most people have seen their phone bills accumulate lots of fixed charges and taxes. Indeed, before I switched to Skype, fixed charges and taxes amounted to 56 percent of my regular telephone bill! Some taxes relate to your cost of calls and so decline as your cost of calls decrease. But most are truly fixed, in the sense that even if you don’t make a single call during any given month, you still have to pay them. To eliminate the fixed charges and taxes, you’d need to reduce the number of phone lines entering your home or eliminate them altogether. By using Skype you can do this and so avoid many fixed charges and taxes—and it’s all legal!
Connecting Skype Access Point
 Once you’ve located an access point, it’s time to connect to Skype Zones. First, make sure you are running the Skype Zones client program (Start: All Programs: Skype Zones: Skype Zones). When you run
Skype Zones and are in range of a Skype Zones access point, a window should pop up that invites you to sign in to the Skype Zones network. Alternatively, you can open the Skype Zones client (right-click on the Skype Zones icon in the Windows system tray and choose Open Skype Zones), and then click on the link Available Signals.
This should display the Available Wireless Networks page in the Skype Zones client. To connect to a specific access point, simply click on the blue Connect button opposite the desired wireless network name. To disconnect, just click on the green Connected button. If the wireless access point is part of the Skype Zones network, you will be prompted to sign in when you connect. Once connected, your online status in the Skype softphone will change to Online and you can start using Skype as you would from any regular Internet connection.
Finding Skype Zones Access Point

To use the Skype Zones client program to search for access points, first open the client by going to Start: All Programs: Skype Zones: Skype Zones. Next, click on the link Find A Location, which displays a search page, as shown in the figure. Frankly, the only advantage of using the search facility in the Skype Zones client program is that it works even when you are not connected to the Internet (the list of available access points is downloaded to your PC and is periodically updated). However, it doesn’t always have the most up-to-date list of available access points.
Tuesday, August 31, 2010
Using Skype zone
 To find an access point using a web browser, first go to www.skype. com. Click on the Skype Zones link, which can be found toward the bottom of the home page. On the Skype Zones web page that appears next, clicking on the link Find Skype Zones will display the web page shown in the figure above.
Suppose you’ll be in Madrid, Spain, some time during the next few days and you want to find out where you can access Skype Zones. Type “Madrid” in the city search criteria, and then click on Search. You will be given the list of Skype Zones available in Madrid, as shown in the figure.
Sign up for Skype Zones
 To sign up for Skype Zones, complete the following steps:
1. Go to www.skype.com and click on the Skype Zones link, which can be found towards the bottom of the home page.
2. From the Skype Zones web page that is displayed, click on the link Sign up for Skype Zones now to get started.
3. Next choose the plan you want, Unlimited or AsYouGo, put an acceptance tick in the box underneath the service agreement, and click Next.
4. Enter your personal details (name, address, and so on) into the web form that appears and click Next.
5. Because the Skype Zones service is provided by Boingo, you must next create a Skype Zones user account (a user name and password, which need not be the same as your Skype user name and password) with Boingo. Enter your desired user name and password for Skype Zones, and then click Next.
6. Enter your credit card information for billing purposes, and click Next.
7. Finally, review all the information you have entered so far. If the information is correct, click Submit.
Phew! Now you are a Skype Zones subscriber. However, there is one more thing to do before you can actually use Skype Zones: you must download and install the Skype Zones software. After clicking on the Submit button on the final page of the signup process, you will be presented with a web page from which you can download the Skype Zones software. Just click on Download Skype Zones For Windows and in the popup window that appears, click on the Run button. Follow the instructions of the Skype Zones installation program, which will install and then run the Skype Zones program, which is shown in the figure above.
Chewcking if Wireless is Enabled
 Before launching yourself into this chapter any farther, you should first understand that Skype Zones is a wireless network service, so your PC must be wireless enabled in order to make use of it. To check whether your PC has a wireless network adapter installed, go to Start: Control Panel and double-click on Network Connections. This should open a window that displays the available network connections for your PC. If, under the category LAN or High-Speed Internet, you have an entry named Wireless Network Connection (or something similar), you’re good to go for this chapter. If not, you’ll need to install and set up a wireless network adapter for your PC before you can use Skype Zones.
Saturday, July 31, 2010
Using Call Forwarding
How quickly calls are forwarded depends on your online status. The following table indicates the how quickly calls are forwarded based on your online status.
Armed with the information in this table, you can decide how best to use call forwarding. You can set your online status (Online, Skype-Me, Away, Not available, or Invisible) so that if you are at your PC you have the option of taking the call then and there; and only if you don’t pick up will Skype forward the call. Or you can set your online status (to Skype not running or Offline) so that Skype always and immediately forwards all incoming calls to the destination (or destinations) of your choice.
Setting Up Call Forwarding
To set up call forwarding, go to Skype: Tools: Options …, and in the window that appears, click on Call Forwarding & Voicemail. This displays the option settings for both call forwarding and voicemail. To activate call forwarding, check the box opposite Forward calls when I’m not on Skype. The default setting, also called the basic setting for call forwarding, allows you to forward a call to one destination. Advanced call forwarding allows you to forward incoming calls to up to three different destinations. When a call is forwarded, it rings all forwarded destinations at the same time; whichever destination picks up first gets the call. You can switch between basic and advanced call forwarding settings by clicking on the links Basic Settings and Advanced Settings, respectively.
Setting Up and Using call forwarding

It allows you to reroute incoming calls to other phone numbers, including Skype numbers, regular numbers, and mobile numbers. To forward calls to regular and mobile phones, you must be a subscriber to SkypeOut, and forwarded calls will be billed just as though you had personally called the forwarding destination phone from your PC using Skype. Incoming calls to your Skype account from both other Skype users and from regular and mobile phones (if you’re a SkypeIn subscriber) are forwarded in the same way.
Wednesday, June 30, 2010
Listening to voicemails
 Missed calls, like other Skype events, are flagged for your attention in the New Events tab (which is the second tab from the right) of the notification bar. Click on this tab to see recent missed events, including voicemail messages that have been left for you, as shown in the following figure.
Clicking on a voicemail event in the New Events tab of the notification bar takes you to the History tab, as shown in the next figure. Voicemails that you have not yet listened to are flagged by a red dot with a star. By clicking on the green round button with an arrow on it to the right of the voicemail item, you can listen to your voicemail using the audio-out device you have configured for Skype (for example, headphones or speakers).
How to Direct Call to Voicemail?
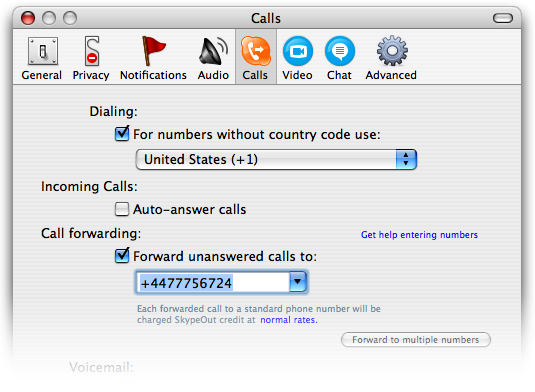
 To have unanswered incoming calls directed to your voicemail, simply put a tick in the box opposite Send Unanswered Calls to Skype Voicemail. If you want to control how and when calls are redirected to voicemail, click on the Advanced Settings link alongside Send Unanswered Calls to Skype Voicemail. This generates a window in which you can customize how your voicemail behaves, as shown in the following figure.
How to add personalized message to voicemail?
 By default, you are given a rather bland “The person you are trying to call is not available …” prerecorded message. This is what callers hear when they are redirected to your voicemail. However, you can replace the prerecorded message with a personalized greeting of up to sixty seconds in duration.
Go to Skype: Tools: Options …, and in the window that appears, click on Call Forwarding & Voicemail. A settings window appears, as shown in the next figure.
Look under the heading “Welcome Message” at the bottom of this page. To record a personalized greeting for your voicemail, click on the middle square button with the red circle on it. Speak into your microphone (or headset or handset) to record your greeting and then either click on the same red button again to cut the recording short, or let the recording run to the end of its allotted 60 seconds. You can now review your greeting by clicking on the green square button with an arrow on it. Now, when callers are directed to your voicemail, they will hear your personalized greeting message.
If you’re not satisfied with the greeting, you can either rerecord it by hitting the middle red square button again and repeating the recording procedure, or you can click on the red square button with a circular arrow on it to reset your greeting to the default message.
Monday, May 31, 2010
How to Get Skype VoiceMail?

The easiest way to get Skype Voicemail if you are not a SkypeIn subscriber is to click on the My Account tab (which is the tab on the far right, and might have a SkypeOut credit balance amount on it if you are already a SkypeOut subscriber) of the Notification Bar in the Skype softphone. This displays a group of links, one of which is for Skype Voicemail, as shown in the following figure. Click on the link for Skype Voicemail. You will be asked to sign in to your Skype account, which requires the same username and password that you use to sign in to the Skype softphone. After signing in, you’ll see the Buy Skype Voicemail web page.
Choose a subscription period, 3 months or 12 months, and the click on the Buy this button for your choice and complete the payment process.
How to Get SkypeIn?
The easiest way to get a SkypeIn dial-in number is to click on the My Account tab (which is the tab on the far right) of the Notification Bar in the Skype softphone. This displays a group of links, one of which is for SkypeIn, Click on the link for SkypeIn. This opens a browser window and presents you with a form to sign in to your Skype account, which requires the same username and password that you use to sign in to the Skype softphone. Next, you are presented with a web page giving an overview of your account.
In your account overview page, click on the link Buy SkypeIn Number. This displays a page from which you can choose a country for your dial-in number. After you select a country, you need to choose an area code prefix. You are then presented with predefined numbers for that area code. Search among the available codes until you find one that strikes your fancy, and click on it. Choose a subscription period: 3 months costs 10 ($12), and 12 months costs 30 ($36).
Next, click on the Buy selected number button, which takes you to Skype’s payment page. Follow the prompts to purchase your number.
After payment is complete, go to your Skype softphone and again click on the My Account tab (which is the tab on the far right) of the notification bar.
You should see something like what’s shown in the next figure, indicating that your newly minted dial-in number and voicemail account have been activated. Tell your friends, family, and colleagues what your new number is, and you’re ready to receive calls from regular and mobile phones. If you want additional SkypeIn dial-in numbers, just repeat the procedure described in this section.
How to Pick SkypeIn Number?

When you get a regular phone number from your local telephone company, you are typically only given the option of getting a number with the local area prefix of your geographic location. That is, you are restricted to dial-in numbers for the area where you live. This is not the case with SkypeIn numbers. With SkypeIn there’s nothing stopping you from having a London, England, number, even if you live in New York. Even better, there’s nothing stopping you from getting SkypeIn numbers for London and New York; and, based on your needs, dial-in numbers dotted around the globe. Welcome to the new world of Internet telephony!
At the time of this writing, SkypeIn numbers were available for the following countries: United States, United Kingdom, Denmark, Estonia, Finland, France, Germany, Poland, Sweden, Switzerland, Brazil, and Hong Kong. Within each of these countries you are typically given the choice of several area codes to choose from. You can choose any country and available area code within that country for your SkypeIn number; you will have to choose from a predefined list of numbers for the digits that follow the area code. By choosing the country and area code carefully, you can have a SkypeIn number that best meets your needs—for example, to allow toll-free local calls for friends and family. Indeed, following this logic, you can pick and choose several SkypeIn numbers to minimize the hassle and cost of calls for your most frequent callers. This way, for example, you can have a local dial-in number for your home in New York and a dial-in number in Seattle for the convenience of your mom and dad living in the Seattle area.
Friday, April 30, 2010
How To Have Cheap SkypeOut Rate?
Many SkypeOut calls can be made at Skype’s low global rate of $0.021 (0.017 ) per minute. However, SkypeOut rates do vary by destination and the type of phone being called, and they are often more expensive when a call is made to a mobile phone. Before calling a new number, you can check the SkypeOut rate by using Skype’s Dialing Wizard, at www.skype.com/products/skypeout/rates/dialing.html. Using the Dialing Wizard you can check the SkypeOut rate for a number before making the call, which can avoid a costly mistake, as a handful of SkypeOut rates are $1.20 (1 ) or more per minute!
SkypeOut calls rounding
SkypeOut calls are rounded up to the next whole minute. So, if you make lots of short calls, you will end up paying for a lot of fractions of unused minutes. This “call rounding” effect means that your effective per minute call rate can be somewhat higher—up to about 40 percent more—than the advertised per minute call rate. Even with the call rounding effect, SkypeOut’s low per-minute call rates ensure that most of your calls will nevertheless be cheap. At Skype’s lowest global calling rate of $0.021 per minute, the worst case effect of call rounding results in an effective per minute call rate of only $0.029, which is still cheap when compared with most rates for domestic inter-State and international calls of regular and mobile phone plans.
SkypeOut calls of four seconds or less are free, and the clock starts running once a call connects. If you bail out of a SkypeOut call within the first four seconds, it will cost you nothing. So, rather than wait for someone’s answering machine, hang up and save yourself some money! Note that only the first four seconds of the very first minute of call time are free. After four seconds, all calls are rounded upwards in increments of one minute.
SkypeOut calls of four seconds or less are free, and the clock starts running once a call connects. If you bail out of a SkypeOut call within the first four seconds, it will cost you nothing. So, rather than wait for someone’s answering machine, hang up and save yourself some money! Note that only the first four seconds of the very first minute of call time are free. After four seconds, all calls are rounded upwards in increments of one minute.
How to buy Skypeout credit?

Adding to your SkypeOut credit balance is a lot easier than the initial activation process. Just click on the Your Skype Account is Activated link, as shown in the previous figure. This opens a browser window and displays the sign-in page for your account. Sign in using your Skype username and password. This takes you to the Overview page for your account. Click the Buy More Skype Credit link and follow the payment instructions.
Wednesday, March 31, 2010
Anti-Fraud Scheme of SkypeOut

You should be aware of some of the antifraud restrictions Skype has put in place for new SkypeOut subscribers. The first three months as a SkypeOut subscriber are a probationary period in which the following restrictions apply:
- You will only be able to add to your SkypeOut credit balance if it falls below 5 ($6), or 50% of your initial purchase.
- If you pay by credit card, you will be limited to buying a total of 20 ($24) SkypeOut credits per month.
- If you pay using PayPal, your limit will be 30 ($36) per month.
- Using other payment methods, you are limited to 100 ($120) per month.
Getting SkypeOut

The easiest way to become a SkypeOut subscriber is to click on the My Account tab of the Notification Bar in the Skype softphone. This displays a group of links, including one for SkypeOut, as shown in the following figure. Click on the link for SkypeOut. This opens a browser window in which you are asked to sign in to your Skype account using the same user name and password that you use to sign in to the Skype softphone. After you’ve signed in you will be presented with a web page giving an overview of youraccount. Click on the link Buy Skype Credit. As a new Skype user your only option, using the Buy this button, is to buy 10 ($12) of credit to activate SkypeOut and provide some initial call time.
After clicking on the Buy this button for 10 ($12) of SkypeOut credit, you are asked to verify some information, including your e-mail address and Skype password. You must also select a preferred currency for payment purposes. Finally, you must agree to Skype’s terms of service and click the Submit button.
Skype will process your order and send a confirmation code—normally within just a few minutes—to the e-mail address you provided. Enter this confirmation code into the current web page, and then click the Submit Confirmation Code button. Make sure your preferred currency is shown, and then click the Buy this button. This takes you to a web page form that asks for your name and billing address. Fill in the form with your details. There are two buttons at the bottom of this form. The first is labeled Save and Use It Now, and the second is labeled Use This Address Only Once. If you plan to buy more SkypeOut credits in the future, click Save and Use This Now. By this time you must be wondering whether there’s an end to this process! The registration process has been set up to combat fraud and, fortunately, you only have to go through it once. So, hang in there—you’re almost done!
At this point you should be at the payment method page. Pick your preferred method of payment and click the Continue button. This takes you to the appropriate web page, operated by one of several financial institutions that process payments for Skype, based on your chosen method of payment.
Follow the instructions for your chosen payment method. After your payment is processed, you should see that SkypeOut has been activated and your account balance shown in the following figure. You are ready to start using Skype to call regular and mobile phones!
Testing Skype Video

When testing Skype video, you should first test your webcam to make sure it works. You can then call someone who has a webcam and who is willing to speak with you.
To test your webcam, click on the Test Webcam button in Skype video settings. This should open a window that, if all is working properly, shows your video image, as in the following figure. Clicking on the button labeled Webcam Settings displays a window that enables you to make adjustments (brightness, contrast, and so on) to the settings of your webcam. Change these settings to optimize your video image.
To run a full-blown test of Skype video, you’ll need to find someone—either in your contacts list, or in the general Skype community—who has a webcam set up for Skype and is willing to have a video call with you. If you’re completely new to Skype and don’t know anyone who uses Skype Video, you can try to find someone in Skype-Me! mode who is willing to speak and video with you. People in Skype-Me! mode typically welcome unknown callers, and such people can be found using Skype search (click on the Search button on the toolbar), or by visiting the Skype forums at forum.skype.com/index.php and scrolling down to the Skype-Me! listing.
Saturday, February 27, 2010
Configuring Skype Video

Go to Skype: Tools: Options …, and click on Video to display the configuration settings for video, as shown in the following figure. Most of the configuration settings in this figure are self explanatory and, as you can see, Skype video is enabled by default when you install Skype. If you don’t want to make video calls (perhaps your bandwidth isn’t quite up to it, or you just don’t like it), you can uncheck Enable Skype Video. Alternatively, you can leave Skype video enabled, but uncheck Start my Video Automatically, which gives you control over when to make your video available to be seen by others.
Installing a Webcam

A typical webcam plugs into a USB port on your PC and comes with drivers and software to make it work with Windows. Some webcams require the drivers and software to be installed on your PC before you plug in your webcam, while others do it the other way around. If you follow the instructions supplied by your webcam manufacturer, you should be fine.
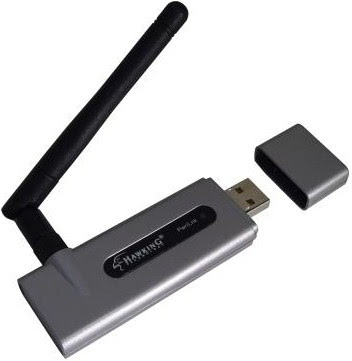
To install a webcam, you will need a spare USB port. Most PCs have anywhere from two or four USB ports, but given the number of peripherals that use USB, these can fill up pretty quickly. If you need more USB ports for your PC, you can use a USB hub to give you additional ports.
To use the webcam to make Skype video calls, you will need to position it so that you can look at it while you talk. Most webcams come with a privacy shield, which can be placed over the lens to block your image when you don’t want anyone to see you. Many webcam users leave the privacy shield in place most of the time, and only flick it out of the way when they’re sure they want to be seen.
Skype Video Requirements

For you to make use of Skype video, you need to meet certain minimum requirements, as detailed in the following sections.
If you want to have a good experience using video, you should double those minimum requirements. Skype recommends, as a minimum, that your processor speed be around the 1 GHz mark. As most webcams connect to your PC using USB, you will also need a spare USB port.
If you are to have anything like real-time moving pictures, puts additional demands on your Internet connection.
Specifically, you will need a good deal more available bandwidth (data transfer speed) than for plain-vanilla Skype voice calls. Skype recommends a bandwidth (send and receive) of at least 256 Kbps for Skype video to work well. Skype video will work at lower speeds, but the streaming image might be jerky and broken up.
To use Skype video, you will need a Skype-compatible webcam. You will also need to install the webcam and configure it for use by Skype.
Sunday, January 31, 2010
Multi Person Chats in Skype
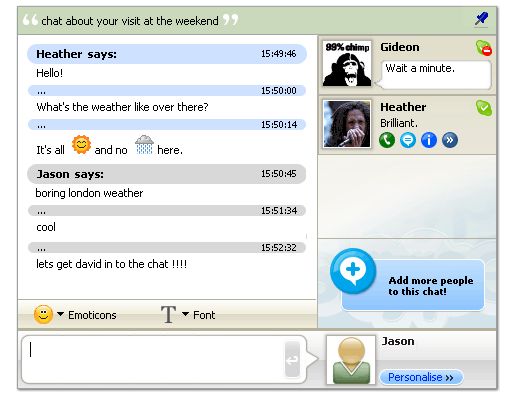
Click on the Contacts tab to display your contacts list. While holding down the control key on your keyboard, click on the Skype users with whom you want to conduct a chat session. With multiple Skype users thus selected, click on the Chat button of the Skype toolbar; or rightclick with your mouse and choose Start Chat from the popup menu that appears. Starting a chat session in this manner will open a chat window with all the selected Skype users as active participants.
How to Search Other Skype Users?
 You can search for other Skype users in two different ways. First, you can click on the Add Contact button on the toolbar, which opens a new window in which you can search for a Skype user by entering that person’s real name, Skype name, or e-mail address. Second, by clicking on the Search button on the toolbar, a window opens that allows you to search for a Skype user by entering that person’s real name, Skype name, or e-mail address; but in addition, you can search using these criteria: country, state, city, language, gender, and age range; and you can also search for people whose online status is in Skype Me mode.
How to Call Other Skype Users?
 If the person you want to call is already in your contacts list, the simplest way to call him or her is to go to your contacts list (click on the Contacts tab to display the contacts list panel), select the contact you want by clicking on it with your mouse, and then click on the call button. This starts a call and opens a tabbed call panel for that call. Alternatively, once you have selected the contact, rather than clicking the call button, you can either double-click on the selected contact, or right-click on the selected contact and pick “Start Call” from the popup menu that appears.
If you want to call someone who is not in your contacts list, you must first enter his or her Skype username in the address bar, and then hit the enter key on your keyboard or click on the call button. This will open a tabbed call panel for that call.
Subscribe to:
Posts (Atom)