Tuesday, December 30, 2008

Forwarding calls when you can’t answer

Skype’s call forwarding feature is very simple to set up and operate. It works like this: If someone calls you on Skype and you’re not able to answer, the call is routed to the first Skype ID or SkypeOut number in your call-forward list. If the call receives no answer there, it is routed to the next number on your call-forward list.
You can call forward to as many as three Skype IDs or SkypeOut numbers. Skype-to-Skype forwarding is always free. Forwarding to a landline or to a cell phone incurs the regular SkypeOut charges and requires that your account have SkypeOut credit. The account that does the skyping out pays for the call, which makes sense. Suppose you’re in the United States and, from your PC, you skype someone located in France. If that person has enabled call forwarding to his or her cell phone, then he or she (and not you) incurs the SkypeOut charges.
For basic call forwarding, follow these steps:
  1. Start Skype and choose Tools>Options from the main menu. The Skype Options dialog box appears.
  2. Click Call Forwarding & Voicemail.
  3. Select (check) the Forward Calls When I Am Not on Skype check box, enter the Skype name you want your calls forwarded to in the Enter Phone Number combo box, and click Save.
For call forwarding to more than one Skype name or SkypeOut number, follow these steps:
  1. Start Skype and choose Tools>Options from the main menu. The Skype Options dialog box appears.
  2. Click Call Forwarding & Voicemail.
  3. Click the Advanced Settings link, select (check) the Forward Calls When I Am Not on Skype check box, and enter the Skype names you want your calls forwarded to in the Enter Phone Number combo box.
  4. Enter the additional Skype names or SkypeOut numbers (see Figure) as appropriate in the remaining Enter Phone Number combo boxes and click Save.
If you are uncertain how to enter a SkypeOut number, click the Get Help Entering Phone Numbers link, which takes you to the Web page at www.skype.com/products/skypeout/rates/dialing.html. This page provides assistance on correctly entering SkypeOut numbers, including looking up the appropriate country codes.
You must have Skype credit to forward a call to a SkypeOut number. Interestingly, Skype Voicemail does not record forwarded messages. Systems such as Pamela (described later in the chapter) do, and they add some other very cool features. Skype Voicemail and call forwarding offer basic functionality, but other messaging features in Skype (such as SMS messaging) and add-on products that work with Skype (such as Skylook and Pamela) offer you more.

Taking messages with Skype Voicemail

Skype supports an easy-to-use voicemail system. One convenient benefit of using Skype Voicemail is that your audio messages — both your greeting and the incoming messages people leave you — are not stored on your computer but instead are stored remotely on Skype’s central servers. As a result, you don’t have to worry about missing calls when you turn off your computer. Before you can use Skype Voicemail, you have a bit of setup to do. The following steps show you how to start your setup and record the Voicemail greeting that your callers will hear:
  1. Start Skype and choose Tools➪Options from the main menu. The Skype Options dialog box appears.
  2. In the list on the left side of the Options dialog box, click Call Forwarding & Voicemail, as shown in Figure. The right portion of the Options dialog box changes to show the settings related to these two services.
  3. In the Voicemail section on the right, select the Send Unanswered Calls to Skype Voicemail check box to activate your voicemail. Below the Voicemail section of the dialog box, you find the Welcome Message section containing the three buttons you’ll use to record and play back your Voicemail greeting.
  4. In the Welcome Message section of the dialog box, click the Record button (the button with the triangle) and speak the Voicemail greeting you want callers to hear (see Figure). Your greeting or welcome message may be up to 60 seconds in length. If you have a SkypeIn number, don’t forget to use part of that time in your welcome message to tell your callers to leave their phone number.
  5. Click the Stop button (the button with the dot) when you’re finished recording.
  6. Click the Replay button (the button with the arrow) to listen to the message you just recorded. If you don’t like what you hear, you can return to Step 4 and re-record your greeting.
  7. When you’re satisfied that you recorded the perfect message, click Save.
Skype Voicemail has an advanced setting that you can use to avoid being interrupted by additional calls if you’re already speaking on a call. To select this setting, click the Advanced Settings link in the Voicemail section of the Options dialog box (refer to Figure) and select the I Am Already in a Call check box in the resulting Advanced Voicemail Settings dialog box . You also find settings for other situations in which calls are sent to your Voicemail, as follows:
  • When you don’t answer: In the appropriate text box, enter a number (of seconds) that tells Skype how long to wait for you to answer the phone.
  • When you reject an incoming call: Select the appropriately named
check box if you want to send rejected calls to Voicemail. You can easily sign up for or renew your Voicemail service by going to your Skype account log-in page and clicking the Buy Now button under Skype Voicemail. If you are already using the Skype Voicemail service, you should see an Extend button instead of Buy Now. The URL for reaching your login page is generally https://secure.skype.com/store/myaccount/ overview.html.

Staying Connected via Skype


Voicemail is nothing new, and Skype comes with basic voicemail capabilities as an optional feature that you can choose to purchase. If you decide to buy the SkypeIn service, your voicemail costs change from fee to free! That’s because Skype Voicemail is bundled in as a free service when you get a SkypeIn number.
Skype offers two other familiar features for helping you manage your messages:
call forwarding and SMS (Short Message System) messaging, which is a standard used for text messaging. You may incur associated fees if you forward calls to a landline or cell phone, and fees for sending text messages depend on the message length and the number of recipients. But the best part about these three messaging features is that they’re easy to use.

Monday, December 15, 2008

Redeeming Skype Credit from a Voucher


Many third-party products include vouchers for services such as SkypeIn, SkypeOut, or Voicemail. If you have a voucher, you can redeem it by following these steps.
  1. Go to the following Skype Web page: https://secure.skype.com/store/voucher/redeem.html Enter your Skype Name and password. If you are already signed in (you may have recently looked at your My Skype Account Overview page, which requires that you sign in), your Skype Name automatically appears in the form and you are not asked to provide a password. No sense in logging in when you’re already logged in! The Skype Web site is constantly undergoing changes, so the URL for this page may change.
  2. Enter your voucher number in the Enter Voucher Details text input box. You don’t have to specify the kind of Skype credit you are redeeming. From your voucher number, Skype can automatically tell whether you are redeeming SkypeIn credit, SkypeOut credit, Skype Voicemail, or any other type of Skype-related service or product.
  3. Select the I Agree to the Skype Terms of Service check box and then click the Redeem Voucher button.
Depending on what you are redeeming, you can get an instant confirmation (such as for Voicemail or SkypeOut, or to extend existing SkypeIn service) that your voucher was successfully redeemed. Other types of services may require additional processing. For example, you may be purchasing SkypeIn for the first time. In this case, you need to specify the country code, area code, and so on. Rather than pay with a credit card or something similar, you can use your voucher.

Buying SkypeIn


The process of buying SkypeIn works much the same way as buying SkypeOut credit:
  1. Go to www.skype.com and click the Sign In link. You should see this link at the top of the page.
  2. In the text input field, enter your Skype Name and password and click Secure Sign In. The My Skype Account Overview page opens, which allows you to buy all the different Skype services: SkypeIn, SkypeOut, and Skype Voicemail. This page also provides account information settings that you may have, including details on your SkypeOut calls.
  3. Directly under the topic SkypeIn, within the Skype and Ordinary Phones section, click the Buy Now button. There are several Buy Now buttons. Make sure that you click the correct one immediately underneath SkypeIn! In the Payments section of your My Skype Account Overview page, you can choose a form of currency. If the currency is set to euros and your currency should be U.S. dollars, you can change it by clicking the Change link, choosing the currency type, selecting the appropriate radio button, and then clicking the Change Currency button. You can buy SkypeIn credit with any of about 15 different currencies. The My Skype Account Overview page is divided into various sections: Call Phones within the U.S. and Canada for Free; Skype and Ordinary Phones; Account Settings; and Payments. Within the Payments section, you can set your preferred currency. Make this choice before you buy SkypeIn credit or any other Skype credit, because if you change your currency, you will incur an exchange fee on your available Skype credit. You set the currency by clicking the Change link in the Payments section.
  4. Select the country from which your Skype phone originates. You can pick from at least 14 countries: Australia, Brazil, Denmark, Estonia, Finland, France, Germany, Hong Kong S.A.R. China, Japan, Poland, Sweden, Switzerland, the United Kingdom, and the United States. Clicking the country flag or name takes you to a new page.
  5. Select the area code and choose a local phone number from a list of available numbers within the area code. Depending on the country you choose, you may or may not be prompted to select an area code (some countries have only one area code for the whole country). Skype generates a list of available numbers for you to pick from. Although Skype provides you with a computer-generated list of numbers, you can pick a pattern, and Skype sees whether it is available. The pattern can include letters and the asterisk (*) wildcard character. As a pattern, you can enter ***Mary and you might get numbers like 367-6279, 123-679, or 333-6279. When you buy SkypeIn, Voicemail is included at no extra charge with your SkypeIn subscription.
  6. Click Buy Selected Number. An invoicing page appears, and you can choose between a 3- or 12-month subscription. You’re also prompted to provide billing information, including your name and address.
  7. Select your payment method. Payment options include PayPal, MasterCard, Visa, regular bank transfer, Moneybookers, and JCB.
  8. Verify the accuracy of your order, complete your payment information, and click Submit. If you are charging your SkypeIn credit to a credit card, you need to enter your credit card number and expiration date. Some countries may require you to pay a Value Added Tax, or VAT. When payment is complete, you see a confirmation page with your order number and order details. It’s always a good idea to print this confirmation page.
For each SkypeIn phone number you get, you pay a set fee for either a threemonth period or a full year. You can have multiple SkypeIn numbers but you’re currently limited to 10 such numbers. Suppose you work for an aerospace firm with offices in San Jose, California, and Denver, Colorado. You may be doing a lot of work in Washington, D.C. You can get SkypeIn numbers for the area codes 408, 303, and 202. This way, your associates in those same area codes can reach you without incurring charges no matter where you are.You might be attending a conference in Toronto, Canada, or visiting family in North Carolina.

SkypeIn is a practical service to have. If you have a small business and want to establish an international presence, SkypeIn is a great way to leverage your resources.
When you list your SkypeIn number on your business card or company letterhead, you can identify it as a tie-line number (that is, a phone number that you set up through Skype), but be sure to indicate the time zone people are calling into. Otherwise, you may be getting calls many hours earlier or later than you are prepared to receive them!

Understanding SkypeIn


With SkypeIn, people in a given region or country can call you by dialing into a local phone number that you set up through Skype. It is just a local call for them, but they can reach you anytime and anywhere in the world you are, as long as you are logged onto Skype. When you get SkypeIn, you also get free Skype Voicemail, so if you’re not connected to Skype when people try to reach you, you can receive messages.
When people call you using SkypeIn, they don’t pay for anything other than the normal charges for calling your local SkypeIn number. If you set up a SkypeIn number that is based in London (with an area code of 207 and country code +44), anyone in London can dial the local number you give them. They pay only the cost of a local call. You can then be anywhere in the world — Madrid, Paris, Nashville, and so on. Anyone can call you from a regular telephone and can talk for hours, and all the caller pays is the cost of the local call in the London. The telephone companies are happy because they get to charge for a call. Skype is happy because you just rented a SkypeIn number for the year. Your caller is happy to talk as long as he or she wants, very inexpensively. Now if your friend Ian from Edinburgh, Scotland, tries to reach you using your SkypeIn number based in London, he pays whatever it costs to place a call from Edinburgh to London. The cost from Edinburgh to London is not a local call, but if you are currently visiting Melbourne, Australia, it’s certainly much less expensive than calling to Australia.
It’s really that simple.
SkypeIn phone numbers can be acquired for Australia, Brazil, China, Denmark, Estonia, Finland, France, Germany, Hong Kong S.A.R., Japan, Poland, Sweden, Switzerland, the United Kingdom, and United States. This list of countries is expanding, as are individual area codes with the countries, so check www. skype.com from time to time for updates.

Keeping track of your SkypeOut accounting information


Another nice feature of SkypeOut is that you can easily review all your SkypeOut calls in a clearly organized Web-based table.
The steps involved in retrieving your accounting information are as follows:
  1. Go to www.skype.com and click the Sign In link. You should see this link at the top of the page.
  2. In the text input field, enter your Skype Name and password and click Secure Sign In Your Account Overview page appears.
  3. Click the Calls & SMS history link.
You can view a list of your latest calls and SMS messages You should be aware that SkypeOut credit needs to be kept “alive.” If no SkypeOut activity occurs for 180 days, any of your remaining credit is wiped out. This does not mean that you must be using up your credit; it just means that you need to have some level of activity during any 180-day interval.

Sunday, December 14, 2008

Navigating touch-tone and voicemail systems


Some of the SkypeOut calls you make may be to automated services that require you to press the touch-tone keypads of your phone. Because you’re calling from a computer, what do you do when the automated voice says, “Press 1 for Yes and 2 for No”? No problem! Skype provides you with a virtual keypad called a dial pad (see Figure 8-10) found on the Dial tab. If your Dial tab is not visible in the main Skype window, choose View➪View Dial from the Skype main menu.
To make dialing on a SkypeOut call even easier, you can copy a phone number residing in any document, such as an email, and paste it directly into the Skype Dial tab. Sometimes phone numbers have parentheses surrounding the area code. These will not cause you any problems. SkypeOut lets you call vanity numbers, which are phone numbers that have a matching word or acronym on the dial pad of a touchtone phone. For example, to order tax forms from the Internal Revenue Service, you can call 1-800-TAXFORM (1-800-829-3676). On the Skype Dial tab, you can enter 1-800-TAX-FORM and click the green call button. Skype then places a SkypeOut call to the phone number 1-800-829-3676. The next time you need a tax form, you know whom to call!

Saturday, November 29, 2008

Dialing international calls with SkypeOut


To make an international call, precede the phone number with a plus sign (+) followed by the country code and the area code and local number. To find the country code, use the SkypeOut Dialing Wizard. On the Windows platform, you open this wizard by choosing Tools➪Call Forwarding and then clicking the Get Help Entering Phone Numbers link. On the Macintosh platform, you may have to add a plus (+) symbol, followed by the country code, the area code, and then the seven-digit phone number (even for local numbers). In the United States, the country code is 1. So, for example, to call toll-free information, you enter +1 800 555 1212. The link for the SkypeOut Dialing Wizard does not appear until you have bought SkypeOut credit.
When you click this link, you are taken to a Web page that lets you choose which country you want and assists you in entering the number correctly.
Macintosh users have a slick feature called a Widget that enables Skype users with Skype credit to make SkypeOut calls. It incorporates the long-distance calling wizard, so you don’t even need to go to a Web page to construct the phone number.
At the time you make your SkypeOut call, you know immediately what rate you are being charged. Skype alerts you to the calling rate by displaying a little caption that might say “United Kingdom 0.0253 $ per minute”. Very handy if you are watching your budget. The number used in this example is a purely fictitious number. If you use a number that doesn’t exist or is invalid, Skype warns you. As a particularly nice feature of SkypeOut, when you make SkypeOut calls, Skype stores or caches the numbers even if they are not part of your Skype Contacts list. The next time you start dialing a SkypeOut number, the portion of the number you dial is matched against your Skype contacts and previously called SkypeOut numbers from the current session. For example, if you start typing the 212 area code, all your 212 numbers pop up to the top of the Contacts list. If you see your SkypeOut number in the displayed list, you can click it and call the number. This is great if you frequently make international calls to the same number. It is a time saver, and you won’t risk making errors when you try to dial a long number.

The price is right


SkypeOut calls vary in price. From at least May 15 through the end of December 2006, SkypeOut calls originating in the U.S. and Canada made to phones in the U.S. and Canada were completely free. As of this writing, we’re hoping that this deal will be extended. Besides this campaign, Skype keeps running other SkypeOut campaigns for different countries, such as Skype Gift Days and others.
Always check Skype.com for current details; there may be a campaign running just for your destination.
When Skype does charge for international calls, the cost is based on a per-minute fee. The most popular destinations have one unified rate, often referred to as the “SkypeOut Global Rate.” As this book was written, the per-minute charge was € 0.017 (euros), which is approximately the same as U.S. $0.021 or £0.012 (pounds). The countries included in the SkypeOut Global Rate are as follows: Argentina (Buenos Aires), Australia, Austria, Belgium, Canada, Canada (mobiles), Chile, China (Beijing, Guanzhou, Shanghai, Shenzhen), China (mobiles), Denmark, Estonia, France, Germany, Greece, Hong Kong, Hong Kong (mobiles), Ireland, Italy, Mexico (Mexico City, Monterrey), Netherlands, New Zealand, Norway, Poland (Poland, Gdansk, Warsaw), Portugal, Russia (Moscow, St. Petersburg), Singapore, Singapore (mobiles), South Korea, Spain, Sweden, Switzerland, Taiwan (Taipei), the United Kingdom, the United States (except Alaska and Hawaii) and the United States (for mobile phones). Countries with “mobiles” in the SkypeOut Global Rate are charged the same 2.1 cents a minute that it costs to make a SkypeOut call to a landline. Calls to other countries have different individual rates. You can find these rates on the Skype Web site (www.skype.com).
If your billing address is in the European Union, a value-added tax surcharge may be applied when you buy Skype credit.

Purchasing credit through your Skype application


When you click the My Account panel of the main Skype window, it expands to reveal various links, one of which is Buy Skype Credit. Depending on what Skype services you already have in place, you may see other links, including Voicemail and SkypeIn. To buy Skype credit, follow these steps:
  1. Click the Buy Skype Credit link. You should momentarily see a padlock display, signifying that you are securely connecting to the Skype site.
  2. Fill in the requested billing information. You are asked to fill out some basic information and method of payment (which can be PayPal, Visa, MasterCard, or other forms of payments, such as a wire transfer).
    • Respond to security confirmation: As a security protection, Skype emails a confirmation code and asks you to insert this code in a confirmation email screen.
    • Receive feedback for your order: Skype displays a notification that your order is being processed and sends you a confirmation by email.
As mentioned earlier in this chapter, you can buy Skype credit only in increments of $10 at a time and you cannot buy additional Skype credit immediately after a purchase without actually using some of your Skype credit. This limitation is a fraud-protection mechanism designed to prevent computers or hackers from artificially racking up free minutes. After you’ve established yourself as a proper user, you get more power on the system.

Skype user profile: Christel


Christel, a young woman living and working in the French Alps, loves to travel around the world on her vacations. She visits the United States regularly and has made many friends all over the country. She tries to keep up with everyone through email, but prefers direct contact. She also wants to improve her English. She has become a veteran skyper, chatting and conferencing with all her new friends. Many of the people she has befriended during her travels have not quite moved into the information age and are still using plain old telephones, or maybe a cell phone.
Christel decides to purchase some SkypeOut minutes. The cost of a SkypeOut call from France to the United States, to a landline telephone, is about two cents a minute. Calling to a mobile phone is more — about 20 cents a minute. However, using SkypeOut gives Christel some advantages. For example, if she’s calling someone in a mountainous area, cell phone service may be nonexistent or filled with “dead” zones, but the SkypeOut service works fine. Internet telephony has a consistently better voice quality than cell phones. Skyping out to a regular telephone is both inexpensive and clear sounding. It gives Christel flexibility because she can call out from any computer connected to the Internet.
Another advantage to Christel is that she can buy ten dollars’ worth of SkypeOut minutes at a time. Because this is all you can buy until you use some of those minutes, Christel can easily budget her international calls so that she doesn’t incur endless charges; she just uses up her “calling currency” and then decides whether to purchase more immediately or hold off for a while.

Setting up SkypeOut


To buy Skype credit, you need to have two important things in place:
  • A Skype password.
  • A valid email account: The email account that you supply is the one associated with your Skype Name.
Without these items, you cannot buy Skype credit or make use of services such as SkypeIn or Voicemail.
You can purchase SkypeOut credit while running your Skype application or by going to the Skype Web site (www.skype.com) from your browser. Here, we show you how to do it from your Skype program. Although the process is entirely equivalent, the screens for purchasing credit directly through the Skype application differ from the way they appear if you go directly to the Web site from your browser to purchase credit.

Thursday, November 13, 2008

SkypeOut pricing


A PC-to-PC connection over Skype is always free. A PC-to-phone connection entails an extra service (SkypeOut) and may entail a fee for its use. As of this writing, SkypeOut calls made from locations in North America to phones in North America were free from May 15th through December 31st, 2006. You can check the Skype Web site to see whether the free period has been extended. By the way, there is absolutely no registration or signup for the free service. Just get on Skype and use it!
When a fee is attached to a call, you are told what the per-minute charges are before you make the call. To make a call, you must first buy Skype credit. Prepayments are made in $10 increments. The next section explains how to set up your SkypeOut credit.

Understanding SkypeOut

The central concept of SkypeOut is simple. If you’re on Skype, you should have the ability to speak to anyone, whether the person is on a computer attached to the Internet, or on a landline or mobile phone. Also, the process of connecting to someone on a telephone should be just as simple as skyping to a person on another computer. SkypeOut is the service that seamlessly bridges Skype users on the Internet to regular phones. Be aware that Skype is not set up to make emergency calls such as 911. Skype is not a replacement for your ordinary phone and cannot be used for emergency calling.

Tuning into the business of Skype video

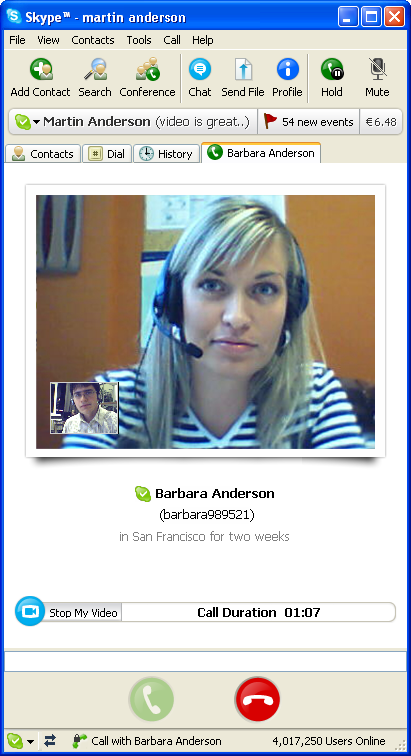
Use Skype video to sell your wares, collaborate on developing a product, or inspect a custom-made prototype before shipping it out to the manufacturer. In business relationships, seeing the person you’re doing business with is helpful, but seeing a product is crucial. Skype video is a quick way to make business communications more efficient and speed the workflow and production environment.
On a small scale, you can set up a jewelry cam to transmit pictures of items, such as rings and earrings, to potential customers. Use a USB microscope to take a closer look at the engraved markings on various items as you talk about each piece. A static picture is helpful to a buyer, but video is dynamic. You can respond to a request to focus on a stone or a setting, thereby satisfying a buyer’s curiosity and overcoming any reluctance on the part of your customer to make a purchase.

Searching for answers with Skype and a scope


Researchers can use Skype video to deploy a group of biologists (or budding student biologists) to collect data, information, and images in the field. Connect a USB microscope to each field laptop and transmit pictures of soil, water, moss, and lichen samples over Skype video. The research group can coordinate field research efforts to their best advantage and send images to remote laboratories, schools, and colleges.
Any field-based research benefits from video transmission tools. You can be digging for arrowheads, pottery shards, or other archeological artifacts with a live webcam or USB microscope serving as a research tool. You can enable a remote expert on the receiving end of the video stream to perform an instant analysis. The scientific tasks can be distributed among field, lab, and academic sites. More researchers can be involved, with less disruption to their own schedules. The research efforts can even be multinational. Skype is currently limited to two video partners at a time, but with some third-party software programs (check out Festoon at www.festooninc. com), video conferencing among more than two people at a time is possible, which multiplies the collaboration efforts of any field-based projects.

Getting the scoop, and then some


Field reporting using a laptop that connects to the Internet from one of the phone company’s PCMCIA cards, equipped with Skype and a small video camera, can be a powerful tool for journalists. Whether a reporter writes for a newspaper, magazine, e-zine, podcast, or blog, the combination of laptops, webcams, and Skype is the equivalent of a TV studio on a shoestring budget. Transmitting live pictures, sound, and text from the middle of an event eliminates any time lapse between what happens in the world and how quickly people hear about it. Television has long been able to bring immediate news to a broadcast medium. Skype video, audio, chat, and file transfer put this same power into the hands of individuals. An enterprising Skype reporter can take his or her live feed and make it into a podcast, or even a “vodcast” (a video podcast) for large-scale distribution. Reporters can even connect to a newsroom with a live Skype video call and have their transmission broadcast on television.

Wednesday, October 29, 2008

Setting up a “NannyCam” or SurveillanceCam


With Skype, you can set up a “NannyCam” to make sure that your kids at home are fast asleep by 8:00 p.m. Here are some quick and easy ways to set up a surveillance camera at home:
  • Create a special Skype Name for your NannyCam: Be sure to set to set your Skype Sign In settings to Sign Me in When Skype Starts and Start Skype When the Computer Starts. This way, if your computer reboots, your NannyCam starts up automatically. If you are already logged in to Skype, you can change these settings by choosing File➪Sign Out from the Skype menu. A login page appears where you can set these options.
  • After you sign in with your NannyCam Skype Name, add your regular Skype Name to your Contacts list: The Contacts list for the NannyCam consists of only one person, namely, you. Of course, you may want to include your spouse’s Skype Name alongside yours. Whatever the case, the list is very short.
  • In your NannyCam’s privacy options, be sure to set the Allow Calls From option to Only People from My Contacts: Setting this option ensures that only you and your spouse can connect to the NannyCam.
  • Enable video and set it to start automatically: In your Skype Video Options window, select Enable Video and then select the check box next to Start My Video Automatically. In the Advanced Options, set the Call option to Automatically Answer Incoming Calls. Test your NannyCam by connecting to it over Skype from one of the other computers in your home, or even from work. Be sure to adjust your webcam to point to the specific area of the room you’re watching, and make sure that the lighting level is adequate. Remember, most webcams give some visual signal that they are transmitting, such as an LED that lights up. You can adjust the audio volume levels for the computer speakers next to the NannyCam so that you have a little PA system, or you can turn off sound altogether.
This kind of setup can give you some peace of mind when you are traveling and want to make sure that everything at home is safe and sound. Best of all, this is a simple and very affordable home security solution for homeowners. Get yourself an inexpensive webcam and dust off that out-of-date computer taking up space in your closet. You won’t have to worry about whether it has enough power; the webcam and Skype are the only applications you need it to run.

Video with file transfer


Video lets you see your fellow skyper, so it’s natural for both of you to want to see what you are both talking about. Unfortunately, holding up an article, letter, or any printed text in front of a webcam is likely to produce a slightly shaky, slightly fuzzy image that is more than slightly illegible. Instead of holding up a paper, transfer that file if you have it in digital form. If you don’t have a digital file, you can scan the article in advance of your video call and then transfer it. You don’t have to open your email to send the file, nor does your recipient have to open his or her email to download an attachment containing the file. We’ve found that transferring a file while we are connected through Skype video does not slow down the transfer rate. Mention it, send it, and show it. It’s almost like being in the same room!

Video with chat


You might think that having a chat window open during a video session would be redundant. After all, you can see and talk — why would you want to write, too? Here are several great reasons:
  • Exchange paragraphs of text: If you are collaborating on a presentation and you want to extract a paragraph from an existing document, you can copy and paste your work into the chat window as you are talking with your partner; this way, you can show the information.
  • Pass a Web link: You can give someone a Web link by just pasting the URL into the chat. Sometimes there’s no substitute for connecting straight into a site. Doing so clarifies the conversation because showing a Web site, image, or paragraph is easier than describing it.
  • Assist in conversations with multiple languages: If you are conferencing with someone who speaks a different language, the chat window can serve as an instant caption to clarify, translate, or define confusing phrases.

How to choose your video “set”?


It’s a good idea to pick a place, a “movie set,” for your videoconference. Although your hair might not cooperate for your on-screen debut, you can at least get the backdrop right. Here are some ways to get “set” for video:
  • Select an all-purpose background: The simplest set is a solid-colored background. Quiet backdrops such as curtains or undecorated walls actually make transmitting video a little easier because there is less visual information to send. However, with high-speed lines and more efficient webcam software, you can add more interesting backgrounds without degrading the video signal too much.
  • Create a mood: A good backdrop for your video setting might be a library wall. Another is your collection of photos or artwork on display. On the other hand, if you’re teaching online and need to demonstrate a lesson — perhaps you are teaching a Sign Language class, for example —then a simple, blank backdrop will prevent distractions for your viewers.
  • Lighting your set: Having a well-lighted area keeps you from being lost in the shadows. Lighting brings out color and detail of objects and individuals. Sensitive webcams can boost low light, but they need to have at least some light to boost. You can move a lamp stand close to your “broadcast station” if you don’t have enough natural light. Arrange your light source to illuminate your face. Fluorescent lights, usually mounted on the ceiling, cast a greenish glow (not very flattering), whereas tungsten lights, such as the ones usually used in table lamps, warm your skin tones. Although natural light is best, it’s available only during the day, of course. If you do have a source of natural light, take advantage of it, because you still need a little more light than whatever your computer screen provides. During the day, you can set up a laptop and portable webcam near a window, but be careful not to aim the camera at the window unless you want to appear in silhouette. Shift your chair, or move the angle of your laptop or desktop to take advantage of a light source such as a window behind a desk.
  • Control background sound: Another consideration for an effective video set is background sound. If you live near a road or highway, you might want to move away from the window to eliminate all that motor noise. If you are near a construction site, calling in the evening, after workers go home, is a better choice.
  • Choose a set outside your home: With wireless Internet access in public parks, cafes, or even libraries, you can have a video chat from your favorite hangout. Keep the location consistent, though. Every time you pick a new place to set up your webcam, you need to find a wireless connection, adjust your position to take advantage of the light, and accommodate background noise. Showing up at the same place at the same time shortens setup time. If you pick a venue with a lively, noisy background, dedicated headsets are required so that you can hear and be heard. A picture is worth a thousand words, but you need to hear the words as well as see the picture; otherwise, videoconferencing isn’t much fun. Visual “noise” can be as disruptive as any other brand of noise. On the other hand, all that background activity may be just what you want your caller to see. There’s no rule that videoconferencing needs to be just face to face. Determining the view your webcam shows makes you a director, of sorts, so be creative as you express yourself. Take advantage of the capability. A few preparations can make a big difference in your experience. Your videoconferencing environment is a balanced combination of backdrop, light availability, and camera model. Some more expensive webcams are much more sensitive to low light and transmit significantly better at night.

Skype webcam basic rules


We’ve all seen the caption rolling across our blank TV screens: “Please pardon the interruption. We are experiencing technical difficulties.” Skype video is your show, and a little attention to lights, sound, connections, and camera placement helps your viewers enjoy it more. Use the following “commandments” to help you keep your show on the air:
  • Plug in your camera.
  • Plug in your camera before launching Skype.
  • Plug in your microphone before using Skype (unless your video camera has a built-in microphone).
  • Point the camera the right way.
  • Turn on a light and let it shine on you!
  • Turn up the sound. Make sure that your sound setting isn’t on mute.
  • Make sure that your image resolution is not set too high; otherwise, you might see funky pixels and colors. You can change your image resolution within the specific video software installed with your webcam. Not all webcam software offers a choice of resolutions, so you may not have to worry about changing this. But if you have a choice, a video image that is 640 by 480 pixels and millions of colors may be a little rich for transmission bandwidth.
  • If you don’t see or hear anything, close Skype, plug in all your devices, and start Skype again.

Friday, October 17, 2008

Installing and Setting Up Video For Skype (On the Macintosh)


Some Macintosh computer models, such as the iMacs, have cameras built in, so there is no need to install a separate webcam and special drivers. Macintosh laptops and towers can accept firewire webcams (webcams that connect with a special firewire cable for fast video data transmission), such as the iSight camera, also without any additional software installation. Skype works seamlessly with the Macintosh video drivers to detect iSight as well as built-in cameras.
Not all webcams work with Macintosh or PC computers. Make sure that you read the system requirements on the webcam package before you buy it for your Skype video setup.
Setting up Skype video on the Macintosh is simple. The following steps use iSight as an example, but the steps should be similar for others.
  1. Choose Skype>Preferences>Video. The video configuration window opens. If you don’t have a built-in camera, plug your iSight webcam into a firewire port and turn it on by opening the lens.
  2. From the Camera drop-down list, select your camera if it is not already detected.
  3. Select the Enable Skype Video check box.
  4. Choose your video options by selecting the check boxes or radio buttons (as the case may be) next to each choice, as follows:
    • When I Am in a Call: It’s best not to check the option to start your video automatically. Give yourself a chance to compose yourself before appearing on camera.
    • Automatically Receive Video From: You can be super cautious and choose no one, or you can allow video only from people on your Contacts list.
    • Show That I Have Video To: You can choose to keep your video capability a secret and choose no one, or reveal it only to people on your Contacts list.
  5. Click the red gel radio button on the far-left corner of the window title bar to close your Preferences window.

Making a video call on your PC


Now you’d better comb your hair because you’re ready (we hope) to become a video star. Glance in the mirror to check your smile, clear your throat, adjust the camera, and take a deep breath; you’re about to go live on Skype!
To make a video call on your PC, follow these steps:
  1. Select a contact from your list in the main Skype window.
  2. Click the green call button.
  3. When your contact answers, click the little video icon located at the bottom of the Skype call window.
That’s all there is to it! You’re on the air in your very own show with your very own fans (even if those are just Mom, your kids, or Dennis from the office). It’s a good idea to test your webcam before you start your video call. From your Skype menu, choose Tools➪Options➪Video. In the Video Options window, click the Test Webcam button. Your video window will appear with a live image. If you don’t see anything, make sure that you have selected the Enable Skype Video check box and your cables are all plugged in!

Checking your sound settings


You’ll want to make sure that you’re actually piping in sound through your webcam and that the volume level is adequate. Many webcams have visual sound meters that light up as you speak so that you get feedback concerning your volume. One reason to check your webcam’s sound is that you may have more than one sound input device attached to your computer. If you’re unsure of which one is active, just tap the microphone — you’ll find out soon enough!
To adjust your volume:
  1. Choose Start>Settings>Control Panels>Sounds and Audio Devices. The Sounds and Audio Devices window appears.
  2. Click the Audio tab to open the Sound Recording window; there, click the Volume button. In the window that appears, you see a virtual sound mixer with four volume sliders. Among the sliders are two choices for audio input, Line In and Microphone. Select the check box beneath the volume slider labeled Microphone
  3. Using your mouse, move the slider up or down to raise or lower the volume.

Monday, September 22, 2008

Setting Skype video options

To configure your Skype video options, choose Tools➪Options➪Video Video options require that you have a video device, either a webcam or software such as CrazyTalk (which animates a character’s mouth and mimics your lip movements as you speak). To use video, you have to select Enable Skype Video before continuing. You should deselect the When I’m in a Call: Start My Video Automatically option. You probably should also set the Automatically Receive Video From option to People in My Contact List.
Here’s a list of Skype options you may want to set:

Category Option
Privacy Allow Calls from My Contacts
Video Enable Skype Video
Video When I’m in a Call: Automatically Start My Video
Video Show That I Have Video to People in My Contact List
Advanced Automatically Answer Incoming Calls

Skype video is very stable. However, Skype is constantly improving its software and therefore continues to label its video feature in Beta mode,

Installing your video driver

Your webcam should come with its own installation software. Although each brand is different, all involve some common steps to install the software drivers. Following are some tips to consider.
Turn off your anti-virus and anti-adware software before installing new video drivers. You can turn them back on after the video installation. The webcam you may be using may not have the most up-to-date video driver for your computer and operating system. Check for updates from the
manufacturer on its Web site. (Hint: Look at the support and download pages for updated drivers.)
Don’t plug in your webcam before you install the video driver. In almost every webcam installation, you need to wait until the software prompts you to plug in your device

Shopping Guide for Webcams

While you’re webcam shopping, it’s a good idea to review the list of features published for each webcam you’re considering. Compare that list with the following items to get the most flexibility out of videoconferencing with Skype:

  •  Wide field of view
  •  Microphone included with camera
  •  Microphone contains noise cancellation capability
  •  Minimum lens distortion
  •  Low light boost
  •  Manual pan and zoom control
  •  Face Tracking software
  •  Avatar creation software included
  •  USB 2 enabled for fast transmission
  •  Wide-angle lens

The less you have to fiddle with your webcam, the smoother your video conversation will be. A webcam with a fixed focus nails you to the chair. You can’t move out of range, reach for a book, or lean back in your chair without slipping out of camera range. A webcam with a wide field of view that tracks your movement, keeps your features on-screen even in dim light, and doesn’t distort your features makes video chats a more natural activity.
Webcams with built-in microphones, especially noise cancellation microphones, give you a definite advantage. Microphone webcams eliminate an extra piece of hardware with extra wires that take up precious USB ports on your computer. If making a video call forces you to plug in a webcam, a microphone, and headphones as well as deal with the tangle of wires, plugs, and devices, you may just decide to forego the whole experience. One good webcam combines all these devices, simplifying the setup and letting you concentrate on what you want to say, not what you need to plug in to say it.
Often, you can take advantage of your webcam’s noise cancellation microphone even if you don’t enable video. You can choose your webcam as the sound input device in your computer’s sound control panel and not even have to set up a separate microphone! To do so, follow these steps:
  1. Choose Start➪My Computer➪Control Panels➪ Sounds and Audio Devices➪Audio.
  2. In the Sound Recording section of the Audio window, click the drop-down list and select your webcam.

Friday, September 12, 2008

When you should disable face tracking?

If you are a little hesitant to let your camera follow you around, you can always activate the manual pan and zoom option. To do so, follow these steps:
  1. From the Skype menu, choose Tools>Options>Video>Test Webcam>Webcam Settings.
  2. Select the Off radio button to stop Face Tracking.
Click the arrows in the Webcam Settings window that appear above the Face Tracking radio button choices to move the camera lens in any of four directions as well as to zoom in and zoom out. Disabling Face Tracking in the Webcam Setting window is preferable when you want the camera to stay focused on an object that you are describing, or if you want to control who is displayed in the video as you speak. If your mom were sitting beside you in front of a webcam as you spoke to your niece, you would probably want the camera on your mom’s reaction when she finds out that a great-grandchild is on the way. Use the manual pan toggle to make sure that the camera is exactly where you want it . . . on your mom’s broad smile!

Understanding Face Tracking Features


Motorized and “intelligent” Face Tracking is a feature that frees you from endlessly adjusting your webcam to keep your face in the viewfinder. The digital or motorized face tracker enables you choose to track one person or detect several people at a time. When a group is in the picture, the motorized face tracker adjusts to try to try to keep everyone in the frame, even if everyone is moving in different directions. Logitech’s Quickcam for Notebooks Pro software lets you choose Face Tracking for a single user or multiple users to follow an individual or a group.
Face Tracking doesn’t just make webcams easier to use with Skype.

Software that tracks facial features has the potential to perform other kinds of functions as well; for example, you may be able to have the software recognize a face, remember a face from a former videoconference, or look up and match a face from a library or photo album. Facial recognition is a handy feature for those of you who never forget a face but never remember a name. You may also be able to analyze the facial expressions and head motions of individuals in different cultures (great for businessmen and diplomats), follow an individual’s eye movements, or even have the software read lips. All these high-tech features are in the works and will eventually add power to our Skype video communication.

Understandng Web Cam Image Quality

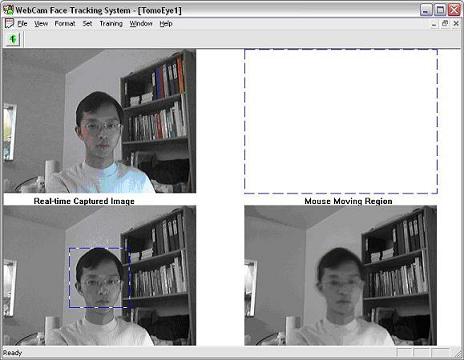
The images rendered by most inexpensive webcams have a classic security camera look — jumpy black-and-white images that have more in common with Charlie Chaplin movies than Paramount Pictures. However, the newest webcams have made tremendous improvements in transmission, color rendering, and image resolution. Some give you a choice of image quality or size. If you pick one with a better quality image, though, you may run into some transmission problems.
Better pictures contain more information that must be pushed through those Internet cables to reach your Skype buddy. The general rule is to pick a size and resolution that’s not too large and not too small, but just right. Experiment with your equipment to figure out which size works best. If transmission is choppy, reduce the picture size in your webcam software preferences. To change your video image size, open the software installed with your specific webcam. You cannot change the image size within Skype software. It is important to explore your webcam software before you make a video call on Skype so that you can be prepared to troubleshoot if there is a problem.
If you are on a Skype video call and you don’t see yourself in your video window, reduce the pixel resolution of your webcam software in the video settings preferences. Chances are, you’ll reappear!

Tuesday, August 26, 2008

Specialty webcams


The most common use for a webcam is to see the person you are calling. But there are other webcams that have more specialized missions. Our favorite is the ProScope USB microscope, available for both PC and Mac platforms. After you download and install the proper drivers that come with this device, it works just like a webcam, with a little twist. The microscope can, of course, take extreme close-ups of objects and materials. Some microscopes come with a variety of lenses to increase the power of the “macro” photographic image. There is even a high-res version of the scope (find out more at www.proscopehr.com/index.html).
Why would you want to use a USB microscope? Perhaps you are a coin and would like to make some trades, purchases, or sales within your Skype coin club. Connect the microscope, turn on videoconferencing, and put your wares on display. The same can be done for other collections; obsidian arrowheads, cameo jewelry, scrimshaw art, and postage stamps are just a sample of collectibles you can show in detail over Skype using a USB microscope.

Another use for a USB microscope is the transmission of live video streaming in field research. If you are a biology teacher, equip your students with a laptop, a USB microscope, and an assignment to capture images of moss samples from a local park. The USB microscope has a built-in light source that will illuminate a bit of moss on a rock or tree bark. Students in other schools anywhere in the world can receive the video of local flora and add it to a database of moss samples for research projects. Transmitting live video from the field is not only inspiring for students and teachers alike but also arms the students of today with tools for thinking about how to design the laboratories of tomorrow. Skype videoconferencing combined with USB microscopy makes it possible to routinely use field microscopes in disciplines such as forensics, and teams of people spread over thousands of miles can collaboratively engage in problem solving in real time.

Clip-on webcams


The clip-on webcam perches on the top of a flat screen and is perfect for a portable videoconferencing setup. One of the big advantages of a clip-on webcam is that it overcomes the common drawback of the casual videoconferencer. That is, most people stare at their screen, at the video image of the person they are talking with, rather than look into the camera. Unfortunately, most cameras are placed in an awkward position, so it doesn’t make sense to look into the lens. It makes much more sense to watch the person on the screen. But then you have two people not quite making eye contact in a medium that’s supposed to connect people face to face! Although anchoring a clip-on at the top of a screen helps aim the lens, some clip-on webcams pivot to allow some subtle adjustment of the lens. You pivot and aim the webcam at your face while you test the software settings for your clip-on. After it’s set, you don’t have to worry about the awkward stare into the computer.

Some clip-on webcams, such as the Logitech QuickCam for Notebooks, have a digital Face Tracking feature (rather than a motorized lens tracker, as described previously) that keeps you in focus as you move toward or away from the lens. The camera doesn’t move, but the software detects faces and makes adjustments to keep them front and center. If you are talking and suddenly lean back in your chair, the image zooms out to show you and the room around you. When you lean forward, the software tries to keep you in the viewing area by zooming in and eliminating the background. If you don’t want to use a wired headset and microphone, you can take advantage of your webcam’s microphone and noise cancellation feature without having the webcam active (heaven forbid you have a bad hair day). In this mode, the webcam’s microphone can continue to work even if the webcam settings in Skype are not enabled.

Standalone webcams


The standalone webcam rests on a platform or a boom (a small pole that supports the webcam), or it nests in a stand. Standalone cams are usually larger and some may have more features than those smaller units that clip onto a laptop or flat screen, although high-end clip-ons are almost indistinguishable in performance from high-end standalones. If you have a dedicated videoconferencing area, have multiple people at your conferencing station, or want to include a fair amount of items in your video viewing screen, then standalone webcams are for you.
Logitech’s Quickcam Orbit MP is an example of a feature-rich standalone webcam.

The camera is a shiny orb with a wide-angle lens that perches on a variable-height post or small stand. Its ultra-wide-angle lens takes in a large area around you. You may have the corner of a room, or a curved conference display set filled with your latest widgets on floor-toceiling shelves. The camera can include your widgets along with you and your sales partner in the mix. This webcam also follows you around your work area using a capability called Face Tracking. The Face Tracking webcam has some cool advantages:
  • Face Tracking allows the camera to fix its lens on the dominant face in the picture (or the most active one).
  • With Face Tracking, as you move, so will the camera: Logitech’s Quickcam Orbit MP webcam actually has a motorized lens that physically moves as it tracks you.
  • Face Tracking accommodates both pan and tilt motion as you move across and up and down: Some webcams move within a 189-degree field of view and a 109-degree tilt up and down.
  • Face Tracking adjusts the webcam focus as you move closer or farther away: If you move closer, the image is tight, framing your face. If you move back, the webcam adjusts its zoom to reveal more of the room. As you move, the webcam changes focus dynamically. Having a camera that makes its own zoom and pan decisions is, well, actually a little spooky!

Considering Types of Webcams


Before you use Skype video, you have to beg, borrow, or buy a webcam. Picking a webcam can make the difference between a great videoconference and a frustrating one. First, determine how, where, and why you are using videoconferencing. Then pick a unit that best matches those needs. If you make video calls at a desktop in your office, you can get a unit that is larger and can be moved around, placed on a shelf, or mounted on an office wall. If you are on the move and need to be totally portable, choosing a small unit that attaches to your laptop is a better choice.

Newer computer models are beginning to include built-in webcams, such as the Apple iMacs and MacBook Pro laptops. A built-in webcam is the most compact way to include video. But if you don’t have that option, you’ll have to do a little research and make a few good choices. The following section should help you with your webcam buying spree.

Enhancing Your Conversations with Live Video


The addition of video to a call may make the difference between touching base and enjoying a true visit, describing an item for sale and clinching the deal, or worrying whether someone is doing okay and seeing for yourself. Coming together in agreement, truly communicating intentions, and clearly describing objects are all circumstances that benefit from the ability to see eye to eye, literally. Videoconferencing can have some unexpected bonuses:
  • Webcams enable group participation: By setting up a webcam, a family can join in on a Skype conversation without having to pass headsets around from person to person.
  • Webcams eliminate wired microphones: Good webcams have built-in microphones, so you don’t need to use the computer’s internal microphone or add an external microphone.
  • Webcams may eliminate echoes: Webcams with noise cancellation features eliminate the voice echo your Skype partner may hear if you don’t have a headset. This noise cancellation feature lets you speak, unfettered, while using Skype video.
  • Webcams eliminate wired headsets: A surprising advantage of connecting a webcam to communicate is that a good webcam takes the place of tethered headsets. Sound is routed through the webcam speakers instead. If you don’t have a webcam, you can still receive a video call. Skype software lets you see video transmitted from another user even if you don’t reciprocate.

Wednesday, August 13, 2008

How to save your chats?


Transform your chats from words in a chat window to a document or presentation by selecting all the messages, copying them, and then pasting them into a text editor. These documents retain the messages, timestamps, and author of each statement. Some skypers have turned their chats into RSS feeds and podcasts, passed them through text-to-speech programs to make them audible, or even used them as captions for a movie illustrating the chat topic.
Transcripts of chat sessions are on your hard drive. If you switch machines, such as between home and office, the session is associated only with the machine you were using. If you need to have the transcripts, Skype contacts, and in fact all your files centralized in one place, you can run Skype “on a stick” (see Chapter 9 for more information on USB Smart Drives, which are thumb-sized drives that have enough capacity to contain the Skype program and all your personal Skype information).

How to Search your chats


In a way, Skype conference chats are efficient in that they save all the information in the exact language each person used. All the statements, re-statements, corrections, corroborations, statistics, Web links, and even emoticons are frozen in time. You can relive the whole experience as many times as you want (which we call an added benefit, for the purposes of this book). To collect bits and pieces from this massive conversation, right-click in the message window and click Find to open the Find dialog box. You can search by word, time, or Skype Name. Because the chat may go on for pages and pages, the Find utility lets you search up or down (from the end or the beginning of the chat).
To find a specific chat, select the Chat History tab and scroll down to pick a topic or first sentence, date, or contact; then, double-click to reopen the chat.

When the chat is over. . .


All chats are archived. It is a default setting in Skype to save every last bit of chat history. You are not forced to do this, and turning off the chat history is a privacy feature (to the extent that chatting is a private act). But the idea that everything you write, and everything everyone writes to you, can be saved, published to an RSS feed, added to a blog, or just printed, outrivals the most ambitious diary ever written.
Preserving your chats “forever” is easy. Choose Tools➪Options➪Privacy and
select Forever from the pop-up menu that appears. Of course, you can also
choose No History, 2 weeks, 1 month, or 3 months, but there’s something to
be said for having the ability to save your words forever (or at least until you
get a new computer). In the same Privacy window, you can click Clear Chat
History and wipe out your entire archive. The catch is, your chats probably
exist on someone else’s computer, and maybe that person is an avid chat collector.
Chats are saved locally, not on any central server. All chat participants
have equal-opportunity archiving capability.

The never-ending chat


A Skype chat can last forever. A group of chatters, passionate about a particular topic, can form a chat club, forum, or special interest group. If they bookmark the chat, then each time someone writes a new comment all participants are instantly notified in their chat taskbar, even if all the chatters have closed their chat windows. In fact, when a new message is added, all the bookmarked chats “wake up.” To make a chat an ongoing chat, each member of the club must leave his or her Skype software running. The best part is those 3:00 a.m. epiphanies when all the points you wished you’d made in the middle of the chat come to you. Now you have an audience.

Chatting in the Past, Present, and Future

Chats persist. That is, they don’t necessarily disappear when you leave them; they come back when you call them; and they can go on and on. In contrast to other instant messaging systems, Skype chats are like social diaries. They record and remember everything you wrote and everything written to you unless you make an effort to eliminate them by clearing windows or limiting how long they are saved in history. Read on for more about saving and deleting chats.

Opening your windows


Skype sets the area you use to write text as the smallest box in the chat window. It doesn’t have to stay that way, though. You can “grab” the top of the text window and pull it up to have more space to write and see what you have written. Enlarging the space allows you to view paragraphs of text you are editing and are about to send to your fellow skypers, instead of being able to view just a few lines in the text input area. As with other Instant Message programs, you can expand the chat window to make it a full screen.

Another way to clean your window is to right-click in the body of the message window and select Clear Messages, which wipes out all the messages in your window. Fortunately, your neatness doesn’t clean out anyone else’s windows. If you really want to pare down your messages to their simplest form, change the chat style in the message window to IRC (Internet relay chat). Choose Tools➪Options➪Advanced and select IRC-like Style from the Chat Style to Use menu. Deselect the Show Timestamp with Chat Messages option. Your chat window will hold more messages in a smaller space (but might be harder to read).

Thursday, July 24, 2008

How to change your text size and style?


Changing the font and increasing the font size may be both decorative and practical. Large fonts are easier to see. Fonts with serifs are more formal as well as easier to read, but they take up more space. You can change the fonts by selecting the Font pop-up menu just above the writing box in your chat window. You can experiment with each font to see which is best for you. Note that changing fonts may replace the shaded separator bars with outlined placeholders (which may or may not be empty), but forfeiting shaded separator bars is a small price to pay for legibility. Any font changes you make in your chat window are for your eyes only. Other chatters do not see your font selections.
If you change your font size and style and are totally miserable, don’t despair; you can restore the default font. It’s Tahoma, 8 points, Western script.

How to hide your contacts?


You may want to simplify the chatscape so that you can see more of the text window. Click the Hide Users button to eliminate the Contacts list and expand the user text window. You still know who is chatting, and you can bring your Contacts list back at any time by clicking the Show Users button.

How other skypers can get your attention?

With Skype, you can choose how you are notified when someone invites you to a chat. You can have a chat window open immediately when the chat starts, or you can have a pop-up alert tell you that someone is waiting for your attention. You can even decide not to have any obvious alert, although you may still like to have the option of knowing that a chat is about to start.
Select from the following types of options:
  • Show alert pop-up: Choose Tool➪Options➪Notifications and select Display Notification, If Someone Starts a Chat with Me.
  • Show chat window: Choose Tools➪Options➪Advanced and select Pop Up a Chat Window When Someone Starts a Chat with Me. Click the Chat alert to expand the window and type away in the text box.
If you don’t respond to an alert, your Skype window indicates that one new event has occurred. If you click the chat event link, your chat window opens for business. You may hear a sound alert if you have chosen Tools➪Options➪Sounds and selected the check box next to Play Sounds. These options (well, two of them) are a little like call screening. You want to know who is calling, but you want to choose your chats carefully. A highly social person with a long contact list can easily be overwhelmed with willing, needy, or just plain gregarious skypers. It’s nice to have some control over your time and privacy.

Sunday, July 13, 2008

How to bookmark a chat?


Some chats are worth setting aside in a special place for quick access. Skype has a bookmarking feature for these chats. You can bookmark only chats that have a topic, Web site, emoticon, or email in the topic bar; otherwise, the pushpin-style icon used to mark the chat is not shown. To set up a bookmark, click the pushpin icon in the chat topic bar. When this icon is “pushed in,” the chat appears in a special list that you open by choosing Tools➪Bookmarked Chats.

How to return to former chats?


Just because you left a chat doesn’t mean that the chat has disappeared. You can log off of Skype, log back on, and continue a chat that was started previously. To find your former chats, choose Tools➪Recent Chats and pick the chat you want. Chats are identified by Skype Name and the first line of the chat, or by the topic name if one was chosen and entered. Click the topic and the chat reappears.

If your chat partner is offline when you resume the chat, you may see a gray icon with an X inside it in the chat participant list. When your chat partner is logged on to Skype, the icon in the participant list appears green. A white check mark or a little clock symbol appears next to the green icon, depending on whether the participant is available or away. You can still send a message, or receive a chat message, whether you indicate through your status icon that you are not to be disturbed, away, or otherwise unavailable. However, Skype —again doing your dirty work for you — explains why you don’t answer.

How to leave a chat?


When you want to close a chat, just click the round red button with the white X inside in your windows heading bar. The chat window closes but the chat is still active. To reopen the chat window, select the name of the contact you were chatting with and click the Chat button. The same chat window with the same text appears. You can pick up where you left off before you closed the chat window.

How to Chat Strategically?


Do you ever get a sensitive telephone call at work and find yourself whispering your way through the conversation? Or perhaps you are calling someone on your cell phone and the signal stops. Well, the Skype environment gives you both the opportunity to communicate privately and the choice to type or talk. You can receive a Skype voice call and respond in a chat window. The half-voice, half-chat conversation is a great solution to the open office or portable cubicle work area.

Another reason for a half microphone/half chat conversation is that sometimes you may not have a microphone available. Your sound preferences may not be working properly, so you can’t hear the caller’s voice (or your caller may be your 86-year-old dad who has no idea what a sound preference is or how he would change it). Having an alternative way to respond to a call provides a simple way to overcome the personal and technical glitches that trip us up on a daily basis.

How to swap contacts?


File transfer is one of several actions you can carry out on an individual basis. You can also send a list of contacts to other users. Simply choose the Send Contacts menu item and then select the contacts you want to send. Of course, your contacts must authorize your chat partner before he or she can see their online activity, but this process is much more efficient than flipping through the old Rolodex for phone numbers. Another useful feature of a Skype chat is having each participant’s profile on hand.

There may be members of the group you have never met. Their profile can contain useful information such as where they live, a Web site for their business, and a phone contact. The old problem of trying to remember everyone’s name and what he or she does for a living is greatly alleviated by having access to a profile to review while you’re on the chat. Transferring files and swapping contacts holds enormous potential for efficient workflow. In writing this book, we took advantage of these capabilities, even when we were sitting in the same room. Sometimes the files popped up faster on our screen than we could have handed them to each other across a table. Large files took longer, but after each file was sent and received, we were all on the same page — literally.


How to pass notes around the virtual room


The Skype chat window serves as a virtual conference. As in a face-to-face meeting, you can place a document in front of every participant of a Skype conference — just to make sure that everyone has all the facts straight. Skype permits the transfer of files instantly to all or only selected participants. If your chat window is too narrow to fit all the toolbar buttons, you can click the double arrow to reveal hidden toolbar buttons and then click the Send File to All button. You now have access to your directory and can open a file and deliver it. What your chatters see is an alert that lets them know you are sending a file.

An easy way to transfer files to members of your chat is to drag the file from a folder in Windows Explorer, Windows desktop, or My Computer directly into the chat window. You can even drag an image that’s visible from your Web browser into the chat window.

Chat members have to agree to receive your file. If you pick a file to send and realize it is the wrong one, you can cancel the delivery. However, you have to do this quickly, before someone accepts the package. You can send files only to contacts who have authorized you (they agreed to exchange information upon first contact). So you may be in a chat with five people, but because you have formally authorized only two contacts, you can transmit and receive files only from those two contacts. Another strategy for sending information in a chat environment is to paste a Web address or an email address in the message window. These are live links that chatters can click to access Web sites. Everyone can check out the same Web page or email the same organization as the virtual conference takes place. To add to the flexibility of distributing information, you can also copy and paste prepared text into a message window, which is even faster than file transfers if you don’t care about the document format. Not every file is meant for all eyes. Fortunately, Skype enables you to send a file to one person at a time by choosing the double arrow that appears when you move the mouse into the user’s identity box. Clicking the double arrow opens a vertical menu that includes Send File. This menu enables a person-to-person file transfer. Alternatively, you can send a file to a single participant in a chat by dragging a file from your desktop or Windows Explorer directly onto the contact name in the Chat Drawer of your chat window.

Thursday, June 26, 2008

How to block a chatter from your Contacts list


Being invited to a chat can be like going on a blind date. Although you may know who invited you, you may not know the other personalities you are asked to socialize with in the chat window. And as with the majority of blind dates (we speak from experience), you may choose not to give out your phone number — or Skype Name, in this case. If you find a chatter who is objectionable, you can’t banish that person from the chat but you can block him or her from your Contacts list so that he or she can no longer have one-on-one chats with you. You can do this immediately in the Contacts window shown during your chat. Simply select the user’s name in the Chat Drawer, right-click to bring up the pop-up menu, and click Block This User.
When you block someone, Skype does your dirty work for you and turns away the unwanted skyper.