
Another new productivity tool Skylook brings to Outlook is conversation recording and archiving. Suppose that you set up an Outlook appointment to skype Bob and discuss the details of an upcoming workshop. Rather than take notes during your conversation, you can use Skylook’s tools to record, preserve, and store the conversation.
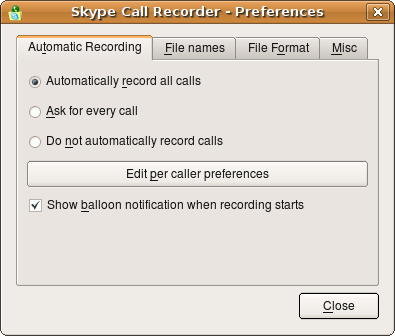
To the right of the orange Skylook Tools icon on the Skylook toolbar is a small triangular “notch” for Skylook Options and Other Functions. Clicking this icon opens a menu. Select Options and click the Recording tab; from there, you can set the recording conversations features with the following choices:
- To automatically record all calls. When automatic recording is active, the recording starts as soon as you make or receive a Skype call.
- To record only your side or both sides of the conversation. Select either Record My Voice Only or Record All Voices. You can set this option to apply separately to Skype-to-Skype calls or to SkypeIn and SkypeOut calls.
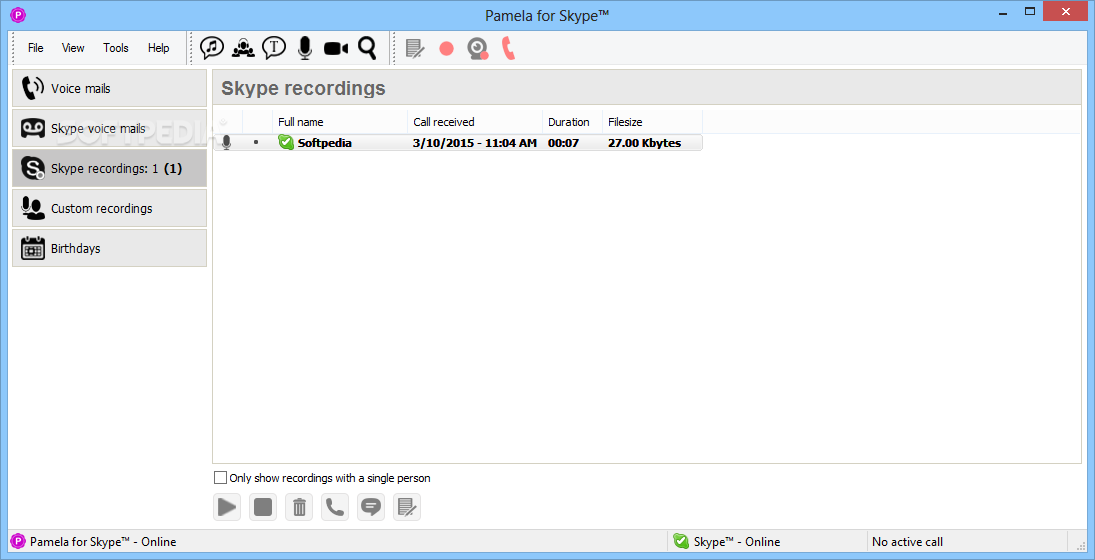
Recording the voices of other parties may be subject to legal limitations in some jurisdictions. These limitations may require you to notify the other party that the conversation is being recorded. In some cases, recording the other party, even with notice, may not be legal. Please verify the limitations for your jurisdiction. Even though you may be recording a conversation for your own internal use, it is always good to be considerate and courteous and inform the other party that you are recording the conversation. The Skype Call Monitor is a floating window that pops up to let you know a call is being recorded. When you expand the Skype Call Monitor, it becomes a larger window that displays real-time information about the recording in progress. The information that is monitored includes the length of the recording (in minutes and seconds) as it happens and the size of the recorded file (in KB) as it grows. If you capture every Skype conversation, you may need a lot more hard drive space (and tons of free time to listen to all those conversations again).
Suppose that you schedule a meeting (that is, a Skype conversation) with your good friend Bob in Outlook. When the meeting is about to start, a screen pops up as a reminder to make your Skype call. Click the reminder icon to open your appointment window. You then select Bob’s name in the Contacts box, click the Skype Voice Call button, and you are connected over Skype to good old Bob. If you have call recording enabled, the conversation is automatically recorded and saved as an MP3 file when you log off the call. Skylook then parks the MP3 file in a Skylook Conversations folder. Voice call recording is a full-productivity-mode feature of Skylook. This feature is available in the business, home, or academic versions of Skylook. Basic Skylook, which is free, does not offer any recording tools. In addition to recording conversations, this full productivity mode adds contacts to your Skylook Toolbar, saves your voicemail messages to your Outlook Inbox, and creates a Skype Conversations folder to gather and organize Skype conversations.
When you have full-productivity mode enabled, Skylook presents you with choices in the Skylook Recorded the Conversation For You dialog box. For example, you have the option of emailing the MP3 of your just-recorded conversation to Bob. This handy option saves you from rummaging around trying to find the recording. Simply click the Email a Copy To button, and the recording is on its way.
If you don’t want to record a call, just click the Stop button in the Call Monitor toolbar. If you stop a recording during a Skylook call, the entire recording is deleted. If you want a portion of a conversation preserved, hang up and then reconnect to finish the part you don’t want recorded. The MP3 file of your recorded portion will be tucked away in the Skylook Conversations folder.
Try using Skylook’s recording feature to produce podcasts or online presentations. You can set Skylook options to make sure that you record both sides of the conversation for interviews or conferences. And if you use Skylook calling to coach, mentor, or present to a group, you can choose to record only your lecture so that you avoid capturing any noise from the others on the call.

 When there is no call in progress, Skype usually has three tabbed panels—Contacts, Dial, and History—in its main window. Only one is displayed at any given time, and you can switch between panels by clicking on the tabs.
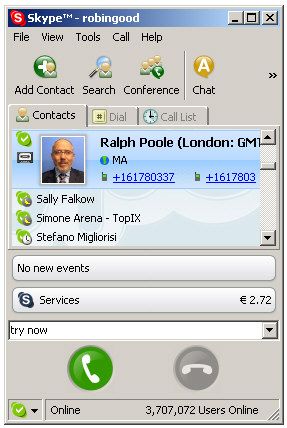 Skype’s main window, as the next figure shows, contains quite a few graphical elements. In brief, here’s what each of Skype’s major graphical elements does:
 The more adventurous reader might want to quickly test some of the other features of Skype: conference calling, chat, and file transfer. To do that, you’ll need to have a handful of people setup in your contacts list. So get the Skype names of some friends (or use the Skype search feature [Skype: Contacts: Search for Skype Users …]) to populate your contacts list, and then try the following quick experiments. They’ll take only a few minutes and will be time well spent.

 If you don’t already have a Skype user name and account, you’ll have to set one up. This will give you access to all of Skype’s free services (remember, it’s completely up to you whether you want to subscribe to any of Skype’s fee-based services).
 Clicking on the Run button will download the Skype install program to your PC. After it is downloaded, you’ll see the window shown in the next figure. Click the Run button in this popup to start the Skype install program. If you don’t want to install Skype, click Don’t Run to cancel the install process.

 Briefly, Skype’s fee-based features include the following:
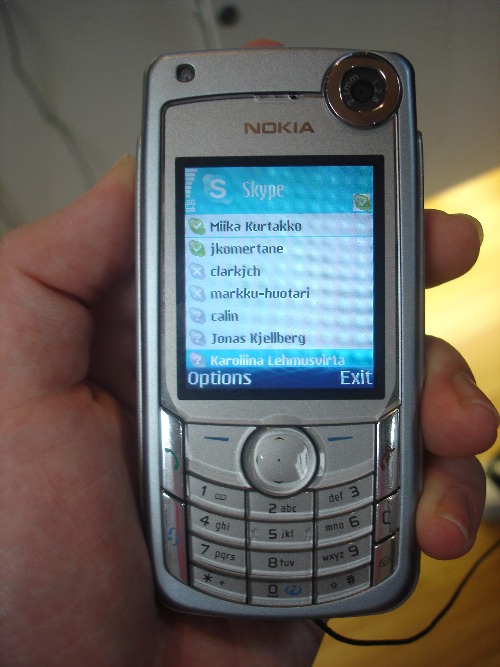


 Apart from continued improvements in the basic technologies that underpin Skype and the improvements in quality they bring with them, what’s next for Skype? For one thing, new Skype-enabled hardware and Skype-compatible hardware is being introduced. For example, Skypeenabled phones and handhelds are being sold that already have Skype installed, configured, and ready to go right out-of-the-box. We can also count on Skype continuing to add new features and services. But perhaps the biggest impact of Skype will be felt once it becomes truly mobile, in a “connect from anywhere and at any time” sense. Already, some cities in the United States are offering free city-wide WiFi Internet access. For many people, this means that a handheld or other portable wireless device running Skype is a close substitute for a mobile phone; the only difference is that calls on Skype are free (to other Skype users) or at very low rates (for calls to regular and mobile phones)!
 In October 2005, Skype was acquired by eBay, which also owns PayPal. eBay’s goal is to use Skype to enable its buyers and sellers to communicate more effectively and so reduce the “friction” inherent in buying and selling things. Overall, this is good news for Skype and for Skype users. Not only will eBay’s user base be encouraged to use Skype—significantly adding to the number of people already using the program—it gives Skype the backing of an Internet powerhouse that has lots of marketing and financial muscle.
 Skype is not the first P2P software to be made widely available via the Internet and to achieve mainstream status. Indeed, the people who founded Skype, Niklas Zennström and Janus Friis, are the same people who created the P2P file sharing program Kazaa, which is the most downloaded (at 363 million as of September 2004) software In the history of the Internet. Skype clearly has something of a\ pedigree.


 Suppose that your company has several thousand active Outlook accounts. Synching up one contact at a time would be out of the question, but using the SkySync Wizard makes this contact mapping possible. SkySync launches automatically during the Skylook setup, but if you want to update your contact links subsequently, choose Tools>SkySync to open the SkySync Wizard and select Search the Global Skype Network for More Matching Skype Users. SkySync goes through all your Outlook contacts and searches for possible matches on the Skype network. Skylook presents possible matches. For each potential match, Skylook asks you whether you want them linked. Suddenly you see that good old Bob has a Skype account, and SkySync links it to Bob’s contact information in your Outlook program. After your Outlook Contacts link up with Skype, simply select Bob from your contacts in Outlook and skype him via the Skylook plugin. To start a new Skype conversation with Bob, follow these simple steps:
 Synchronizing contacts manually through the SkySync Wizard lets you scroll through contacts and decide whether to sync each one individually. However, if you want to synchronize a specific Outlook contact on the fly, here is a little shortcut:


